Tampilkan postingan dengan label blogging tricks. Tampilkan semua postingan

How to add customized three column footer in your blogger

Posted by Unknown Minggu, 06 Oktober 2013 0 komentar
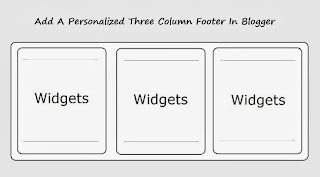
After a long time i am here to talk a few tricks on the Blogging, the three column footer in blogger was used by so many pro bloggers, if you also want to do the same like them, you just need to add some codes in your blogger template and watch your three column footer in your blog in Live

Add footer in blogger


The main advantages of three column footer blogger are

  • It gives more space to your blog
  • you can use it for some extra widgets, important notifications
  • Normally people use it for adding author box, labels, Alexa rank and DMCA Copyrights box

After the discussion on the benefits, we will move to the real test of how to add three column footer in your blog

1) Go to your Blogger blog and sign in with your account

2) After logged in go to the Templates 

3) When you click on Templates, an separate box with both windows will appear at the left side of the templates

4) Click on " Edit Html" then go to the coding box

5) Expand all the widget codes, for the new interface it is little bit tricky

6) Scroll all over template, wherever an arrow mark points out click on all of it it will expand the template

7) Now press CTRL+F , it opens the Search box in the Coding window

8) Now search for this code "  ]]></b:skin>  "

9) Paste the given below code just above the "  ]]></b:skin> " code


/* ----- customizedlower SECTION By http://way2usefulinfo.blogspot.com/----- */
#customizedlower {
margin:auto;
padding: 0px 0px 10px 0px;
width: 100%;
background:#066d87;
}
#customizedlower-wrapper {
margin:auto;
padding: 20px 0px 20px 0px;
width: 900px;
}
#customizedlowerbar-wrapper
border:1px solid #066d87;
background:#066d87;
float: left;
margin: 0px 5px auto;
padding-bottom: 20px;
width: 32%;
text-align: justify;
font-size:100%;
line-height: 1.6em;
word-wrap: break-word;
overflow: hidden;
}
.customizedlowerbar {margin: 0; padding: 0;}
.customizedlowerbar .widget {margin: 0; padding: 10px 20px 0px 20px;}
.customizedlowerbar h2 {
margin: 0px 0px 10px 0px;
padding: 3px 0px 3px 0px;
text-align: left;
color:#ff00f6;
text-transform:uppercase;
font: bold 14px Arial, Tahoma, Verdana;
border-bottom:3px solid #f6dc04;
}
.customizedlowerbar ul {
margin: 0px 0px 0px 0px;
padding: 0px 0px 0px 0px;
list-style-type: none;
}
.customizedlowerbar li {
margin: 0px 0px 2px 0px;
padding: 0px 0px 1px 0px;
border-bottom: 1px dotted #ccc;
}


10) Now search for the "  </body> " and add the below code just above it
<div id='customizedlower'>
<div id='customizedlower-wrapper'>
<div id='customizedlowerbar-wrapper'>
<b:section class='customizedlowerbar' id='customizedlowerbar1' preferred='yes'>
</b:section>
</div>
<div id='customizedlowerbar-wrapper'>
<b:section class='customizedlowerbar' id='customizedlowerbar2' preferred='yes'>
</b:section>
</div>
<div id='customizedlowerbar-wrapper'>
<b:section class='customizedlowerbar' id='customizedlowerbar3' preferred='yes'>
</b:section>
</div&gt
<div style='clear: both;'/>
</div> </div>


11) Now Save the template, if it is successfully done your template will not shows any errors, if you done any wrong coding, it will show so may errors

12) After successfully saving your template, go to your Blogger " Layout " , you can view " Add Widgets " in the Footer bar on your Blogger Template Layout

13) Now you can add your favorite widgets there


Customization of the above codes

For changing the widget width change the width 900px to your choice
For changing the Background color change the background: #066d87 to your choice
For changing the width of column, just change the 32%

I think you have understood all the above steps, if you have any difficulty adding this widget in your blog, just add your problems in the comments ,i will give you the solution  

Baca Selengkapnya ....
How to get my blog index and appear in Google quickly

Posted by Unknown Jumat, 19 Juli 2013 0 komentar
The newbie blogs are increasing day by day, people so often creates a blog and waits for Google to do all the things like crawling and indexing, sometimes when it does not happen they lose their patience in the blog and search engines

What is Blog index
The Google is an Serious task master it not allows any easy task, if you want to get your blog in search results you must follow some simple but effective tasks, before that lean a few basics about how Google works


Google bot is also known as bot or spider, was an auto-programmed software which does the fetching job. Crawling is searching for the new webpages and adding to the list by Google bot regularly, it does this search by using links.
Indexing is Processing of information which it crawls before into an Big Compilation, it do not index flashy files , but it takes on ALT attributes and title tags during indexing


Now going to the real subject of this article, there are some genuine ways for your blog to get notified by search engines easily

1) Submit your Site map to Google Webmasters

The Sitemap is an list of all pages from your blog, which is in Accessible form to your Search engine Crawlers, you must create one and submit to the Webmaster tools

Procedure for submitting your Site map

1) Log in to the Google Web Master Tools

2) Click on the blog title which you want to add Sitemap

3) After an window will appear like below, click on that "Sitemap"

What is Sitemap

4)  The Sitemap will redirects to this page, at the top right corner there is Add/Test Sitemap, click on that


5) Now we get this window like below, add the below given code in that box


atom.xml?redirect=false&start-index=1&max-results=500


6) Now submit the Sitemap, and refresh your page

7) Your submission was over, Google will take some time to index , Be patient

Note- This Sitemap is for only 500 posts, if your blog has more than 500 just change the number 1 and 500 to 500 and 1000 in above code, the code looks like this when we change

atom.xml?redirect=false&start-index=500&max-results=1000

2) Effectively use Social media

This is very helpful if you use neatly, sharing your blog links on your social profiles like twitter and Facebook fan pages, Youtube accounts, Linkedin and Stumbleupon will give you enough visibility for your blog, because as i earlier said, Google crawls your blog by using the Links

I Developed my blog with this awesome fan page General Knowledge for all


3) Submit your blog to the Search engines

This is easy and best way to get quick attention to your blog, i will give the methods to submit your blog to search engines


  • Submit your blog to Google Search engine


1) Go to the Google Url Submission

2) Enter your Blog Homepage url and add your comments if it is necessary

3) Fill the Captcha in that and add your Url


  • Submit your blog to Bing and Yahoo Search engine


1) Go to the Bing Submission Page

2) Follow the Instructions and fill the captcha

3) Enter your Url and submit your blog

Note- Yahoo site explorer is merged into the Bing Webmaster tools, submitting to bing will cover the Yahoo also


4) Submission to Blog Directories

There are lot of blog directories which offer free service, when your blog has good amount of quality content , try to include your blog in popular blog directories like technorati


5) Social Bookmarking and Offsite content

Bookmark your blog with popular social bookmarking sites like Delicious and Stumbleupon and the Offsite techniques like Link Building, and submitting your Guest posts to the Similar niche of your blog. Do not submit to the Spammy sites, as Google do not likes to index a page on the Spammy links


Finally if you follow this ways, your blog will get indexed in Google Quickly and your blog posts will appear in the Search results

Also read : How to Get E-Mail Alerts directly to your Mobile By Free of Cost


Baca Selengkapnya ....

5 Killer Ways to Drive more Traffic to your Blog

Posted by Unknown Rabu, 17 Juli 2013 0 komentar
Thinking about how to get more Traffic in Blog ? there are several ways to get more traffic, out of those some best ways are listed here.

Blogger is one of the Biggest platform to create your Blog and make an Strong online Presence, if we do it perfectly, blogs can work better than websites.


SEO for blogs


Top 5 Ways to Drive Quality traffic to your Blog

1) Social media and Social Bookmarking

The Social Media plays an key role in the Blog traffic, it makes your blog to index faster in Google and other Search engines and enough exposure to the Webmasters. Try to Share your Blog posts in Facebook, twitter and Stumbleupon frequently, but do not make it spammy.

Social Bookmarking also plays an key role , try to bookmark your sites in popular sites like reddit.


2) Guest posting and Blog Commenting

Guest posting is the Best SEO Method to get good rankings in webmasters, contact the similar niche popular bloggers and submit an Guest post, if they accept your post it also drives some good traffic.

Blog Commenting is not best way but still cool enough to get your blog notified, always try to comment on dofollow blogs, commenting on 10 dofollow blogs is better than 100 nofollow blogs


3) Proper SEO and Link Exchanges

SEO is Optimising the Blog for Search engine, if you follow proper SEO techniques you can easily get organic traffic

Link exchanges are leaving your link to other blogger and linking their blog link in your's, it is similar to give and take type


4) Good Content and Proper Navigation

If you write unique content , people tends to read more times and they wish to come to your blog whenever it is updated

Proper Navigation is designing your site such that all the contents are properly listed and easy to read


5) Good template and  Good Title

The template must be selected at the term of their speed, if the blog does not load faster, visitors will get frustrated and leaves your blog

The good title must be selected to get proper attention from the readers and it should tell about your blog , select according to your niche and make the title short and sweet


Also read : Best ways to get more likes for your Facebook Fan Page


Baca Selengkapnya ....

Best and Top Alternatives to Adsense

Posted by Unknown Rabu, 12 Juni 2013 0 komentar
Adsense was the Publishing program from the google, as far as i know it is the leading money bank for bloggers and website owners due to its big heart. But it is so little when it was approving your application, there are lot of terms and regulations, sometimes it seems to be impossible to get adsense. I too faced this problem

What is google adsense


There are some alternatives that will compete with adsense, you can breahe easily now after reading this, but it takes a lot of hardwork and commitment to get success in your blog.


Chitika

Chitika is the next best to adsense, since adbrite was completely shut down due to their economic disaster happened a year ago.Chitika is easy to apply, it will approve your application easily, far more easier than adsense. it gives you silver and gold level ads depending upon your blog traffic

The payment is made by wire (50$ Minimum) and paypal ( $10 Minimum)

Go to chitika official website by clicking here


Bidvertiser

It is an good alternative, which provides some excellent ad formats which do not irritates you readers and xml readers ads and pop under ads are supported. The Payouts are timely and excellent, which they do not ask your Tax number also for your money transfer

The Payment is made by wire/check ( 100$ minimum) and paypal ( $10 minimum)

Go to the Bidvertiser website by clicking here


Infolinks

It is an in-text advertising master, whenever you place the mouse cursor on any word in blog it will pop up the advertising links, so it is some what irritant to the readers.Lot of New features are added in the infolinks, latest one was search widget add on. It is easy to sign up and good pay outs

The payment is made by check ( $400 minimum) or paypal ( $50 Minimum)

Go to the infolinks website by clicking here


Clicksor


It is the good publisher solution like infolinks,  it is good for small websites. It has lot of ad formats which will give you lot of opportunities on money making. It has good and decent CPR, CPA and CPC which is more good on money making.

The payment is made by Check or paypal, both can be pay out at minimum of $10

Go to clicksor website by clicking here


Kontera

Kontera resembles infolinks in their ad formats, it is more tough to get approved by kontera. It do not have any Difficulty in serving ads, you can install by single code. The Paypout is only for paypal, not by check

The Minimum payment for payout is $50

Go to kontera website by clicking here


Baca Selengkapnya ....

How to add Subscription widget for blogger

Posted by Unknown Sabtu, 18 Mei 2013 0 komentar
The Social subscription widget is for the people who wants more genuine readers and good fan following for them. Yes the Subscription widget is an RSS type , which the people will enter their email and subscribe to the updates of the blog. Whenever the user post new content they will get the news on their email immediately.

Cool widget for blogger


The Subscription widget here is mix up of CSS and HTML, and it is flavored with the Social media icons too, which reduces the blog space too.

DEMO

1) Go to the Blogger and sign in with your account


2) After going to your Dashboard, you can see this in your blog


3)  Left to the view blog an arrow is there, after clicking this arrow we get the options like below


4) Now select the Layout Option as shown in above

5) Then Click the Add gadget and Select the HTML/Javascript

Guide to add gadget in blogger


6) Now paste this code in that box


<style> #socialnetworking { border: 1px solid #ebebeb; width: 280px; } .fb-likebox { padding: 10px 10px 0 10px; border-bottom: 1px solid #ebebeb; } .googleplus { background: #eef9fd; border-top: 1px solid white; border-bottom: 1px solid #ebebeb; font-size: 12px; color: #000; padding: 9px 11px; line-height: 1px; font-family: Verdana, Geneva, sans-serif; } .googleplus span { color: #000; font-size: 11px; position: absolute; margin: 9px 70px; width: 280px; } #widgetbox { background: #EBEBEB; padding: 2px 8px 2px 3px; text-align: right; border-image: initial; } #widgetbox .author-credit a { font-size: 10px; font-weight: bold; text-shadow: 1px 1px white; color: #1E598E; text-decoration: none; } .g-plusone { float: left; } .twitter { background: #eef9fd; border-top: 1px solid #fff; padding: 10px; } .fb { background: #eef9fd; border-top: 1px solid white; border-bottom: 1px solid #ebebeb; font-size: 12px; color: #000; padding: 9px 11px; line-height: 1px; font-family: Verdana, Geneva, sans-serif; } .fb span { color: #000; font-size: 11px; position: absolute; margin: -12px 100px; width: 280px; } .pterest { background: #EFF5FB; border-bottom: 1px solid #ebebeb; font-size: 12px; color: #000; padding: 9px 11px; line-height: 1px; font-family: Verdana, Geneva, sans-serif; border-top: 1px solid #ddd; } #email-news-subscribe .email-box { padding: 5px 10px; font-family: "Arial","Helvetica",sans-serif; border-top: 0; border-image: initial; height: 35px; background: #EFF8FB; width: 260px; } #email-news-subscribe .email-box input.email { background: #FFFFFF; border: 1px solid #dedede; color: #999; padding: 7px 10px 8px 10px; -moz-border-radius: 3px; -webkit-border-radius: 3px; -o-border-radius: 3px; -ms-border-radius: 3px; -khtml-border-radius: 3px; border-radius: 3px; border-image: initial; font-family: "Arial","Helvetica",sans-serif; } #email-news-subscribe .email-box input.email:focus { color: #333 } #email-news-subscribe .email-box input.subscribe { background: -moz-linear-gradient(center top,#FFCA00 0,#FF9B00 100%); background: -webkit-gradient(linear,left top,left bottom,color-stop(0,#FFCA00),color-stop(1,#FF9B00)); background: -moz-linear-gradient(center top,#FFCA00 0,#FF9B00 100%); -pie-background: linear-gradient(270deg,#ffca00,#ff9b00); font-family: "Arial","Helvetica",sans-serif; border-radius: 3px; -moz-border-radius: 3px; -webkit-border-radius: 3px; border: 1px solid #cc7c00; color: white; text-shadow: #d08d00 1px 1px 0; padding: 7px 14px; margin-left: 3px; font-weight: bold; font-size: 12px; cursor: pointer; border-image: initial; } #email-news-subscribe .email-box input.subscribe:hover { background: #ff9b00; background-image: -moz-linear-gradient(top,#ffda4d,#ff9b00); background-image: -webkit-gradient(linear,left top,left bottom,from(#ffda4d),to(#ff9b00)); filter: progid:DXImageTransform.Microsoft.Gradient(startColorStr=#ffffff,endColorStr=#ebebeb); outline: 0; -moz-box-shadow: 0 0 3px #999; -webkit-box-shadow: 0 0 3px #999; box-shadow: 0 0 3px #999 background:-webkit-gradient(linear,left top,left bottom,color-stop(0,#ffda4d),color-stop(1,#ff9b00)); background: -moz-linear-gradient(center top,#ffda4d 0,#ff9b00 100%); -pie-background: linear-gradient(270deg,#ffda4d,#ff9b00); border-radius: 3px; -moz-border-radius: 3px; -webkit-border-radius: 3px; border: 1px solid #cc7c00; color: #FFFFFF; text-shadow: #d08d00 1px 1px 0 } </style> <div id="socialnetworking"> <!-- Begin Widget --> <div class="fb-likebox"> <!-- Facebook --> <center> <a style="margin-right: 10px;" rel="me" href="User id" target="_blank"> <img src="http://2.bp.blogspot.com/-TtecU81mxEA/TrHxZowPn9I/AAAAAAAABI8/UGSwDMYkt-c/s1600/Button G.png" /></a> <a style="margin-right: 10px;" href="http://www.facebook.com/Gkinfo4all" target="_blank" rel="nofollow"> <img src="https://blogger.googleusercontent.com/img/b/R29vZ2xl/AVvXsEiQtUrA-HikRIYldW6M4kSboOfrWLwska7R5CvQXb174H1Avw78hkyGDGYifqcXY02oyC4D3gtvmKYKOym4yqp9vCYpyxVePawPyZBmAyrzcrvu_PfvfAfZ6Xp0ccRzOfyGvgWbTSOMCC02/s320/1oaxc4.jpg.png" /></a> <a style="margin-right: 10px;" href="http://feeds2.feedburner.com/Way2usefulinfo" target="_blank" rel="nofollow"> <img src="https://blogger.googleusercontent.com/img/b/R29vZ2xl/AVvXsEiXt7BM9L_6o5bsGgLtNXCaX2L6ySwtV0RCzcgvRn7OzjAgMKPGxzK2N92x5Jr8BvAK45_adL6I0DOoT7pWgKNptco-KC4VjlAq0ZZMaOWGsYvVu2so-LcczgxSPLsu8voe6uOExy1lX5-X/s1600/2d7itk9.jpg.png" /></a> <a style="margin-right: 10px;" href="http://feedburner.google.com/fb/a/mailverify?uri=Way2usefulinfo&amp;loc=en_US" target="_blank" rel="nofollow"> <img src="https://blogger.googleusercontent.com/img/b/R29vZ2xl/AVvXsEjT6NooZ1-XZH6dEspTm7IKmTbR2hJWdFrb7VyoQCfnvaQekngPaH-U-akBDgPaRAVjVlxuq0amfdZimL3ESQLa92J05sypALrMef5ygId7X676xHbl3Q_Px1i4__lvQ9ILMJUDT5HRZqQi/s320/j5krgl.jpg.png" /></a> <a style="margin-right: 10px;" href="http://twitter.com/#!/Usefulinfo4all" target="_blank" rel="nofollow"> <img src="https://blogger.googleusercontent.com/img/b/R29vZ2xl/AVvXsEgnqZ6fTAJ-2azY9MRDlxgyxDWDI4NfgWK9YxOvazTEyTCtrogmP3zdUdVHkQWOBnc_OwBxyVV3p9ekX6vjF3S_Vwbun7LqDOe_y-0DZ1qSo8kff3UE4TrpIYTro_fgoH2h0qT57UVkvGoL/s1600/3312cmr.jpg.png" /></a> </center> </div> <div class="googleplus"> <span><font><font>Recommend Us On Google </font></font></span> <!-- GooglePlus --> <!-- Place this tag where you want the 1 button to render --> <g:plusone size="medium"></g:plusone> <!-- Place this render call where appropriate --> <script type="text/javascript"> (function() { var po = document.createElement('script'); po.type = 'text/javascript'; po.async = true; po.src = 'https://apis.google.com/js/plusone.js'; var s = document.getElementsByTagName('script')[0]; s.parentNode.insertBefore(po, s); })(); </script> <script type="text/javascript"> gapi.plusone.render ( 'plusone-div', { "size": "medium", "count": "true" } ); </script> </div> <div class="fb"> <!-- Twitter --> <iframe src="//www.facebook.com/plugins/like.php?href=http%3A%2F%2Ffacebook.com%2GKinfo4all&amp;send=false&amp;layout=button_count&amp;width=450&amp;show_faces=true&amp;action=like&amp;colorscheme=light&amp;font=verdana&amp;height=21" scrolling="no" frameborder="0" style="border:none; overflow:hidden; width:450px; height:21px;" allowtransparency="true"> </iframe> <span>Like Us On Facebook</span> </div> <div class="twitter"> <!-- Twitter --> <iframe allowtransparency="true" frameborder="0" scrolling="no" src="http://platform.twitter.com/widgets/follow_button.1335513764.html#_=1335528101755&amp;id=twitter-widget-0&amp;lang=en&amp;screen_name=Usefulinfo4all&amp;show_count=true&amp;show_screen_name=true&amp;size=m" class="twitter-follow-button" style="width: 244px; height: 20px; " title="Twitter Follow Button"> </iframe> <script src="http://platform.twitter.com/widgets.js" type="text/javascript"></script> </div> <div class="pterest"> <a href="http://pinterest.com/Usefulinfo/"><img src="http://passets-cdn.pinterest.com/images/about/buttons/follow-me-on-pinterest-button.png" width="169" height="28" alt="Follow Me on Pinterest"/></a> </div> <div id="email-news-subscribe"> <!-- Email Subscribe --> <div class="email-box"> <form action="http://feedburner.google.com/fb/a/mailverify" method="post" target="popupwindow" onsubmit="window.openundefined'http://feedburner.google.com/fb/a/mailverify?uri='Way2usefulinfo', 'popupwindow', 'scrollbars=yes,width=550,height=520');return true"> <input class="email" type="text" style="width: 140px; font-size: 12px;" id="email" name="email" value="Enter Your Email here.." onfocus="if(this.value==this.defaultValue)this.value=&#39;&#39;;" onblur="if(this.value==&#39;&#39;)this.value=this.defaultValue;"/> <input type="hidden" value="Way2usefulinfo" name="uri"/> <input type="hidden" name="loc" value="en_US"/> <input class="subscribe" name="commit" type="submit" value="Subscribe"/> </form> </div> </div> <div id="widgetbox" style="background: #FBEFEF;border-top: 1px solid #ddd;padding: 1px 8px 1px 3px;text-align: right;border-image: initial;font-size:10px;font-family: "arial","helvetica",sans-serif;"> <span class="author-credit" style="font-family: Arial, Helvetica, sans-serif;"><a href="http://way2usefulinfo.blogspot.com/2013/05/''how-to-add-subscription-widget-for.html" target="_blank">Get This Widget »</a></span> </div> <!-- End Widget --> </div>


After Downloading the code, Follow the Below instructions Regarding that above Coding file

  • Replace userid with the google plus page of your blog ( http://profiles.google.com/XXXX)


  • Replace Gkinfo4all with your facebook page of the blog


  • Replace Usefulinfo4all with your Twitter fan page of your blog


  • Replace way2usefulinfo with your feedburner ID


  • Now please save your HTML/Javascript, its done.

Also check the How to Create a Blog in step by step procedure


Baca Selengkapnya ....
Trik SEO Terbaru support Online Shop Baju Wanita - Original design by Bamz | Copyright of apk x8.